Showing posts with label Recipe's. Show all posts

Wednesday, June 20, 2012

Fun foods for summer!

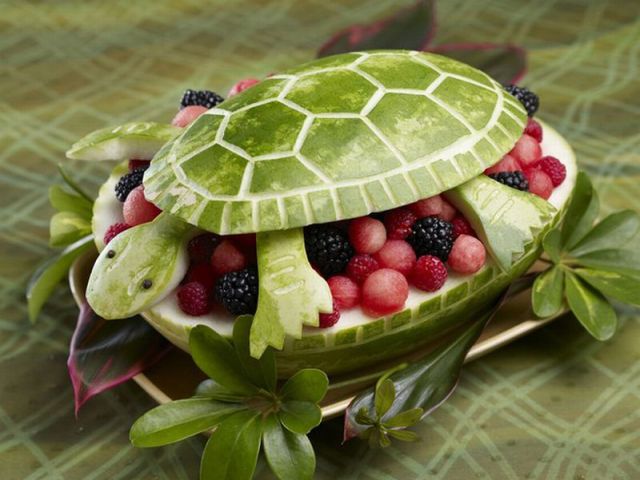
Fun Summer idea's with Food...SRN
I Love to have people come over and serve some really fun foods.
 Out of the ordinary so to speak. 
It taste great and put's smiles on peoples faces. 

Try a few of these!

This is one of my favorites!
My Grand-kids love these!
I love these!
Some skills here!
23846626391240-09101347
Almond ears, mini chocolate chip nose, Licorice tail,
 eye's ? get creative...
Some talent needed for this one...
Natures art work...
Beautiful!


Stuffed Zucchini

 Great share from GroO New York

http://www.kayotic.nl/blog/stuffed-zucchini
 
Tis the Season...

 
Stuffed Zucchini
 
2 zucchinis
1 tbsp sour cream
1/4 to 1/2 tsp salt
1/4 tsp curry powder
1/2 tomato
1 tsp thyme
1 onion
cheese
pepper
Optional: bacon

Kiwi Chocolate Pops

Ingredients self explanatory!


Thursday, June 14, 2012

Food Fun/Ladybugs

 These are just to fun! 
Great Idea for my next luncheon!
Sometimes you just need to have some fun...
 
Cherry tomatoes and black olives make really cute lady birds. Base is made up of sliced baguettes, cream cheese, smoked salmon and flat leafed parsley. (To help alleviate so many questions I would just like to add that in the UK, South Africa and Australia they are called Lady Birds - in the USA they are called Lady Bugs.)


The Black spots are chopped olives, the eye's are cream cheese applied with the end of a tooth pick and the antennas are the stem of the parsley. But remember be creative and make them your own, Just have fun and enjoy! SRN.


Gluten-free Baking...

Great Recipes... Enjoy! SRN  

Gluten-free

Gluten-Free Cornbread
http://www.kingarthurflour.com/recipes/gluten-free

gluten-free recipes

Baking without gluten? Our gluten-free recipes will give you back your baking life. Enjoy yeast bread, pizza, chocolate cake, cookies, and more - all gluten-free, all delicious. (Note: if critically sensitive to gluten, use only certified gluten-free ingredients. Check our list.)

‘famine foods’


 Learn about these wild edibles now,
 then when you need them 
you'll know what to look for... SRN

The future of ‘famine foods,’ 

Unconventional edibles in the garden

Shepherd's purse is common and very nutritious
They’re called poor people’s foods. Plants foraged by starving folk and scavenged when crops succumb to drought: They’re what you eat just to get by. Many are unusually rich in nutrients, have medicinal value and may even taste good. But because they’re free for the taking they get little respect.
Scientists in fields such as ethnobotany study them and the ways they are eaten. But the true experts are indigenous people all over the world who’ve inherited them as part of their culture.

To the rest of us, who rely for our food on an alarmingly few species of plants grown on an industrial scale, these wild edibles are a gardener’s curiosity that may hold the key to a more sustainable way of feeding the world in the years to come.

A treasure house of knowledge about survival plants can be found on the Famine Foods Web site , sponsored by the horticulture department of Purdue University. Browsing through its database, you might be surprised to see a number of foods that are in your yard, such as the leaves of forsythia — eaten in China with oil and salt — or a garden narcissus that the French turn into flour. Will times ever be so bad that you’ll need to nibble the edible leaves of your expensive Japanese maple? Unlikely. But it’s useful to know that a pesky species like shepherd’s purse, a common weed, is a nutritional powerhouse, and that roots from the evil, tree-smothering kudzu vine, steamed and eaten, could someday save your life.

For the most part, though, these names are mysterious and surprising in their numbers. There are well over 1,000 listed, and many more could be discovered by searching beyond the world’s standard fare. It seems that all parts of a plant are tried — leaves, stems, root, seeds, bark — until someone who is as indomitable as the plant itself finds a way to consume it.

In one entry after another, these foods are made tastier by the addition of salt, oils, chile peppers and other condiments. At times they’re blended with staples such as common flours to stretch the supply. Some must be repeatedly soaked and drained, or boiled, to reduce bitterness.

Even more important are the tricks to reduce the toxicity that some foods possess, knowledge that’s in danger of being lost as these plants lose their habitats or fall further into obscurity. As the world’s population expands, we’ll need crops that grow when nothing else will.

Robert L. Freedman, who created and compiled the database and whose “Notes on the Famine Foods Website” gives a fine account of the subject, writes that there is no time to be lost in studying and rescuing both the plants and their lore. “Among these, known famine plant species may provide alternatives to costly Green Revolution approaches to providing staple crops for areas of the world in greatest need of food production self-sufficiency.”

And who knows which among them might someday be culinary darlings? I recall a native poverty food of ours, the eating of which was once so shameful that its remains were quickly buried. It was called the lobster.

Damrosch is a freelance writer and the author of “The Garden Primer.”
 
Tip of the week
Provide a decorative and useful edge to the vegetable garden with a row of okra plants. Sow seeds now and thin after germination so plants are spaced 18 inches apart. Plants can grow as high as seven feet, depending on variety. Soak seeds overnight before planting to speed germination. Apart from local garden centers, a good source of okra seeds is Southern Exposure Seed Exchange (540-894-9480, www.southernexposure.com).
 
— Adrian Higgins

Tuesday, June 5, 2012

Strawberry Margarita Jello Shots Recipe


 OK, I don't Drink but are these beautiful or what!
The picture makes me want to try one... SRN

 Strawberry Margarita Jello Shots
 To get the recipe just follow the link below.
 ENJOY...
 http://homesteadsurvival.blogspot.com/2012/05/strawberry-margarita-jello-shots-recipe.html


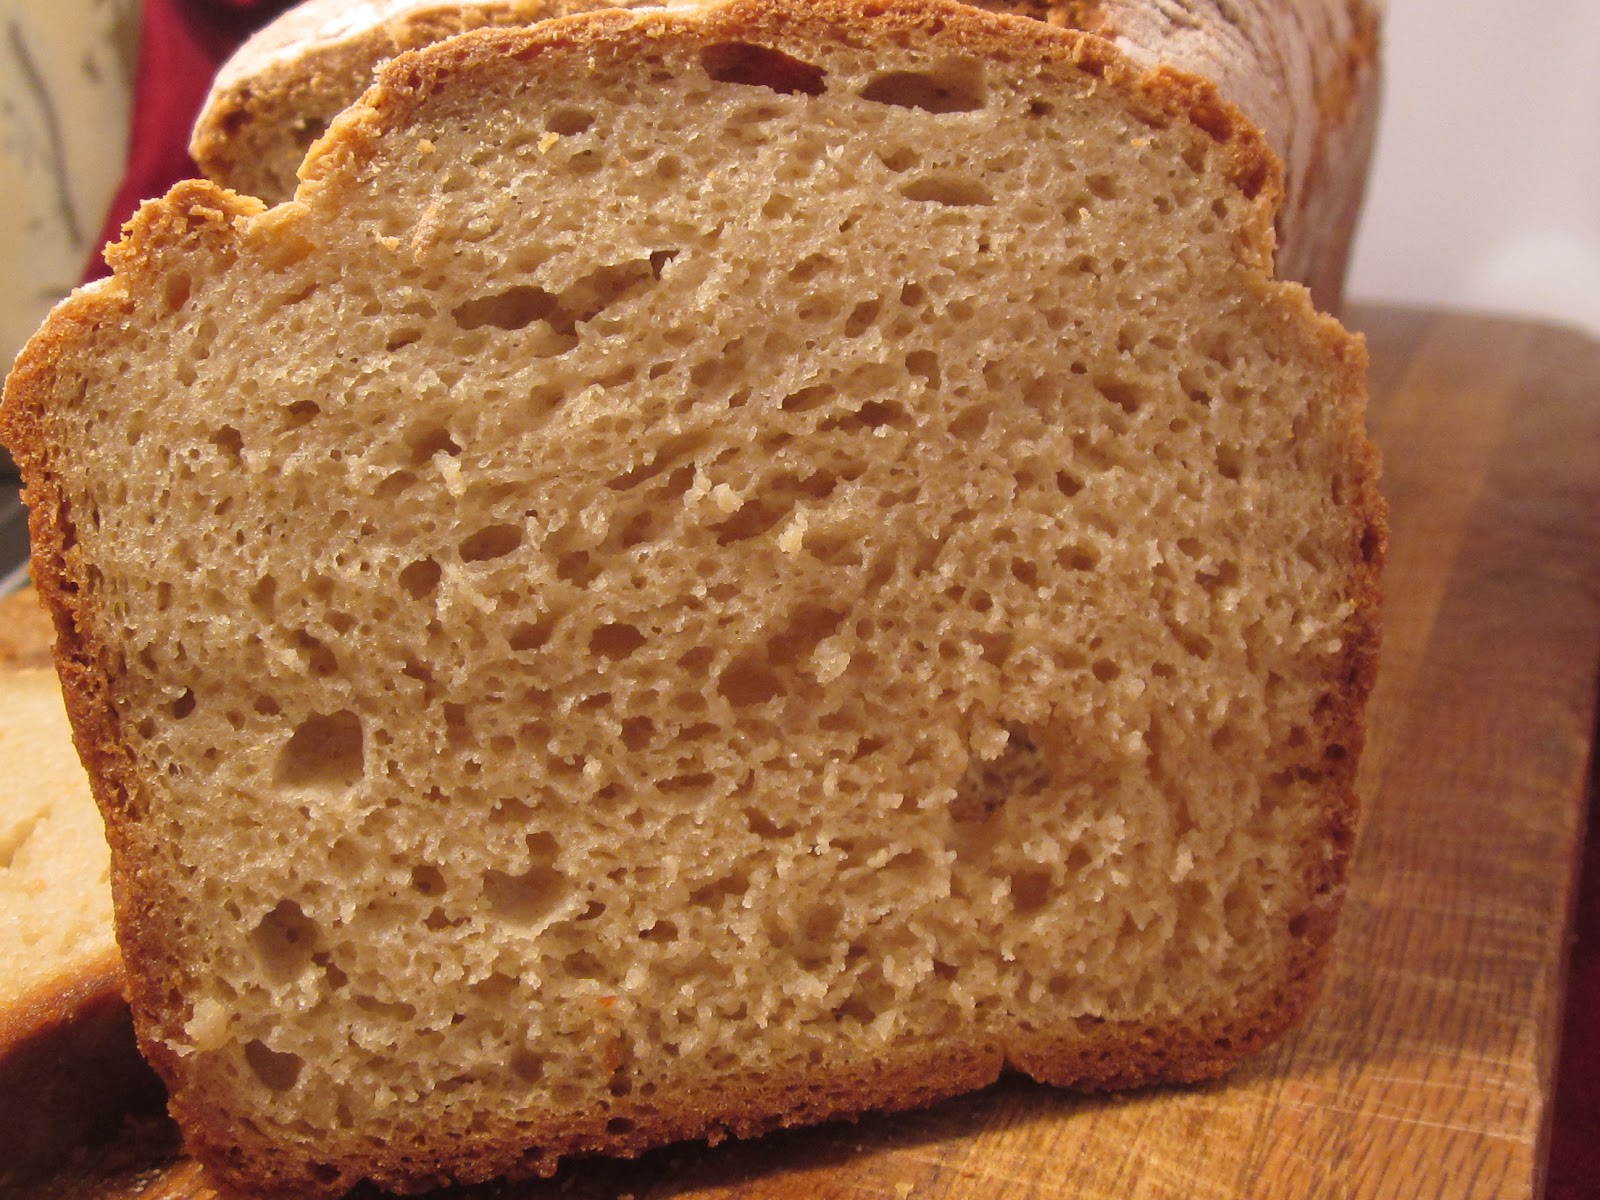
Gluten Free Bread (Whole Grain and Divine!)

This is my next bread experience...SRN
I hate admit, I haven't had a good loaf of Gluten free bread yet.
I'm banking on Chef Tess! 


  Follow this Link to get the recipe...

Flower Ice Cubes

Now these are beautiful! SRN
Great share from: Homestead Survival

See full Article at link below
And make your own!


http://paperdollstudio.ca/blog/2012/05/flower-ice-cubes/

How To Clean and Season Old, Rusty Cast Iron Skillets

Was so excited to see this Post!
 Thanks Sheri Langley Simpson. :)
I love cast iron cooking... 
If you find skillets or pots that look like this 
snatch em up, they are very fixable! SRN

Follow link below for full article...

Dsc_0997_rect540
http://www.apartmenttherapy.com/how-to-clean-and-season-old-ru-151535

Monday, June 4, 2012

LAVENDER TEA ON ICE:


 This is so Pretty! 
Another great Share from Michelle on FB... SRN
 
LAVENDER TEA ON ICE: The lavender plant is native to North and East Africa, the Mediterranean, Southern Europe, India and Arabia, but is also now cultivated and grown in such places as the United States and Japan. Lavender grows best at sites that are dry, and are exposed to good sunlight.

The beneficial constituents of lavender include flavonoids, tannins, courmarines, and essential oil containing camphor, geraniol and linalool.

To make lavender tea, simply infuse a handful of dried lavender blossoms in a pot of boiling water. Let the tea steep for about 7 to 10 minutes. Then strain and enjoy.

The following are the health benefits attributed to lavender tea:
by: Helen Bailey
Lavender tea may help ease insomnia.

Lavender tea may help calm nervousness and anxiety. It may also be used to alleviate stress and uplift flagging spirits.

Lavender tea may help treat an upset stomach, as well as flatulence and colic. It may also be used to treat stomach and bowel infections.

Lavender tea may help alleviate depressive and migraine headaches.

Lavender tea, when applied topically, may help alleviate colds, cough, asthma, bronchitis and similar problems in the respiratory system.

Lavender tea may help induce sweating and consequently reduce the body temperature during fever.


Saturday, June 2, 2012

No Knead 4 Ingredient Overnight Bread Anyone Can Make

This is my favorite way to bake bread, 
it's easy and it taste so awesome. 
Don't forget to buy butter! SRN


This is epiphany bread. Ya know the stuff? The bread that is such a simple idea but one that changes how bread is made in your house. I've been working on this for a while and I think it is time to finally share it here. It has been played with enough now.  It is white bread. Don't panic. It can be done with whole grain. You just need to increase the water to 1 1/2 cups in the recipe. 

Follow this link to see recipe


 I make this dough late in the evening before I go to bed and just leave the bucket in my kitchen overnight. It takes all of three minutes to combine all the ingredients and then it is ready to go.  

Don't adjust the yeast. The beauty of the no-knead is that it takes a long slow fermentation time and that is what will develop a beautiful gluten structure in your bread. This slow ferment replaces mixing. It's crazy-cool! 

Tuesday, May 29, 2012

How to buy a good Avacado all the time...

OK lets try this again... Love this!

Ever wanted the perfect Avocado to make some yummy dip or just to add to your sandwich so off to the store you go, happy to find what you think is the perfectly ripe Avocado, you get home cut into it only to find more of it is black than green. No guacamole today...

Well according to Erica, this will give you a great pick every time :)

Wednesday, May 23, 2012

Using your freezed dried and dehydrated foods in recipes!

My Prepper Potato Salad


Ingredients:
    2012-05-23 15.35.41.jpg
  • 2-Cups dehydrated or freeze dried potato Chunks
  • 2- eggs or freeze dried eggs powder = to 2 eggs
  • 3- heaping tablespoons of freeze dried onion
  • 3-Tablespoons of freeze dried celery
  • 3- Tablespoons of dehydrated bell peppers
  • 3-Tablespoons of black olives
  • 1- cup mayo (Store bought or homemade)
  • 1- teaspoon mustard
  • 1- teaspoon salt
  • 1/2 teaspoon black pepper
  • 1-teaspoon garlic salt
  • 1- teaspoon onion powder
2012-05-23 15.36.40.jpg
In a large pot put your:

Potatoes
onion
celery
bell peppers

Add 8 cups of water and the two eggs (still in shell) bring to a boil and pull your hard boiled eggs out to cool after about 10 minutes. Let the remainder keep boiling for about 10 minutes more, until potatoes are tender.

Cool your eggs and dice them.

2012-05-23 16.21.11.jpg2012-05-23 16.20.34.jpg


2012-05-23 15.41.26.jpg

Next in a bowl mix your Mayo, mustard, black olives, salt, pepper, onion powder and garlic salt and diced egg.

Of course you can also use pickles, dill, cheese or what ever you're favorite flavors are...


Drain your potato mixture and cool, then mix in the dressing you made.

2012-05-23 16.34.37.jpg
 2012-05-23 16.34.59.jpg

 I cut some fresh chives from the yard as a garnish, you can use whatever you like!

This is all done with no chopping or pealing and really is a tasty dish, and best of all you had all this in your pantry ready to go. Store your Pantry right and you can just about have anything your taste buds are hankering for!

When I serve this to friends and family they have no idea that I made it with freeze dried and dehydrated Veggies, and everyone tells me how great it is and wants the recipe. When I tell them what I used, they can't believe it!

Ok this was fun, what can we do next!


Monday, May 21, 2012

Banana Tips

 I love Banana's! SRN   
Great share from:


"Didja know?" Banana Tips:


1. You can separate your banana bunches to slow down the ripening.
2. You can lightly write a message with a tooth pick in the banana peel and later it will turn brown and appear. (great for school lunches!)
3. You can rub the inside of a banana peel on a bug bite, scratch, or burn to relieve the pain and itch.
4. You can throw the peels in your compost or garden. The potassium helps the plants grow.
5. You can shine your shoes and house plants with the peel.
6. You can put the peels in the blender until creamy and use the cream to polish your silver.
7. You can remove splinters and warts by taping a piece of banana peel over the wart/splinters. Let those enzymes go to work!
8. You can tenderize your meats by adding a banana to the pan as you cook them or wrapping them in the peel.
9. You can make a hair conditioner with overripe bananas (blend half one up with an egg and a tablespoon of olive oil. Put it on your hair and wrap a plastic bag around it. Them maybe a warm towel. Leave on for 20 minutes)
10. You can peel the banana from the bottom and then you don't have to deal with the stringy things.
11. You can make a face mask by mashing the banana and mixing it with honey.
12. You can use it to help with high blood pressure, depression, PMS, anemia, brain fuel, stress, fevers, strokes, to stop smoking, seasonal affective disorder (SAD), ulcers, weight loss, heartburn, constipation, hang overs, energy, IBS, kidneys,bones eyesight and morning sickness.
13. You can use bananas to help maintain blood sugar
15. Make tons of variations of dairy free,gluten free,vegan, sugar free "ice cream." I'll post some recipes. My son loves these!
15. You can dip a banana into chocolate and then freeze for a healthy snack ( you probably knew that but I'm anal and didn't want to stop at 14)
Enjoy...

Saturday, May 19, 2012

Make Your Own Garlic, Onion and Chili Powders!

A must have! SRN

how to make onion powder Make Your Own Garlic, Onion and Chili Powders!
Sorry to be MIA the last few days! A bad series of storms hit our area leaving us with no power and lots of limbs down in our yard! Thankfully, no one was hurt and our house was spared, but I’m just now getting back on the computer.
If you’ve ever bought spices from the store, you probably noticed that they often contain ingredients like “ant-caking agent” or “natural flavor” (AKA MSG). Many often contain trace amounts of soy or other fillers, and sometimes these don’t even have to be listed on the ingredients.
Mystery fillers aside, these spices also often sit on the shelf, in plastic bottles, for a long time. By the time you bring them home, they have lost much of their flavor (and did I mention they might contain soy, MSG, or other additives!)
As with many aspects of natural living, simple is often cheaper, easier and more healthy. Making your own garlic, onion and chili powders (or a blend of all three) can be one of the easiest and tastiest changes you can make.

How to Make Onion, Garlic and Chili Powders at Home:

  1. Gather a few onions, several heads of garlic, or 8-10 peppers (sweet, spicy or mixed all work).  You can also mix these three to make an all purpose seasoned salt.
  2. Make sure all are clean, and peel onions or garlic cloves if using those.
  3. For onions and garlic: slice into thin slices (1/4 inch or less) and put on sheet in dehydrator or on lowest setting in the oven (170 or less). For chili and peppers: slice in half and remove seeds (or leave if you want a really spicy version!) Place on dehydrator sheet or on baking sheet in oven on lowest setting.
  4. Dehydrate until they are completely dry and not leathery. They should be brittle enough to break by hand. Depending on type of peppers, onions and garlic used, they may take different times to finish. Check every few hours and remove any pieces that are done.
  5. When all are done drying, put into coffee grinder, food processor or blender. If you want individual spices, blend separately. If you want a mixed seasoned salt, blend them all together.
  6. Once they are finely powdered, leave in food processor or blender with lid  on for at least 10 minutes to let it settle. This is important! Trust me… I learned the hard way! Opening it too soon will lead to a rapid sinus cleanse icon smile Make Your Own Garlic, Onion and Chili Powders!
  7. Store in glass jars and enjoy!

Friday, May 18, 2012

Homemade Quinoa-Amaranth Mango Blueberry Granola-of-Glory

Chef Tess Bakeresse                        Enjoy! SRN


Posted: 17 May 2012 06:13 AM PDT
This week for our Wednesday 5 minute Grain Surgery™ 
I thought I'd show you how to make multi-grain super granola. What do you think? It's a fun way to use a lot of grain and completely cool for being creative with grain. Use the recipe as a guide for the quantities of rolled grain to go with honey and play! I want to hear what you make. 

 A week or two ago, when I showed you how to roll your own oats and quinoa, my son Face had rolled about 3 lbs of oats. It was fun...but I have to say we had a lot of extra oats just laying around. Mind you, I could say right now, "Hey Face, go roll me some oats!" and he would run out to the roller and happily crank that thing. He loves it! To my credit (and this doesn't happen every single day), I remembered to have him roll some extra quinao as well.  
Then we went ahead and  popped amaranth on the stove and make use those beautiful grains to make granola. I decided that I needed to make more granola after making all the pints and quarts of Homemade yogurt that were then piled in my fridge needing some assistance. I don't think my husband can safely resist granola and yogurt together...especially when the yogurt has been converted into his favorite flavors. So far he still begs for the lemon chiffon and the pina colada. That being said, he'd eat yogurt all day in that condition. So...there it is. Waste not, want not. Time to make granola. I like my granola a little less sweet than most folks. Keep that in mind when your making this. 


Quinoa-Amaranth Mango Blueberry Granola-O-Glory
6 cups rolled oats or 6 grain rolled cereal
1/2 cup amaranth (popped to equal 2 cups)
1/2 cup quinoa (rolled to equal about 1 cup. See tutorial here.)
1/4 cup chia seed (see my post on why I use it here)
1T Wise Woman of the East (cinnamon spice and floral blend)
1 1/2 cups pomegranate honey
1/2 cup extra virgin coconut oil or olive oil of your choice (lemon or orange infused rock!)
2 T vanilla
1 1/2 cup freeze dried mango
1 1/2 cup freeze dried blueberries
1 cup almonds (whole or chopped)

Directions: Pop the amaranth. Heat a large deep pan on the stove, medium heat for 2-3 minutes. Pour the amaranth into the hot pan and stir until the grain pops and turns white. Pour out of the pot when all the grain is white. {The full tutorial on popping amaranth is in the chocolate amaranth bread tutorial.}

Combine the honey, coconut oil and vanilla. This pomegranate honey is really a pretty shade of pink. The flavor is totally unique and just beautiful for granola. If you don't have flavored honey, you can use regular honey instead.

In a 2 gallon large bowl, combine the grain, nuts and seeds and spice blend. 

Another shameless plug for the beautiful Chia

Stir the honey mixture into the grain and seed mixture. 
Preheat oven to 350 degrees. Divide granola mixture between two large sheet pans, preferably one with an edge. Bake 15 minutes. Take pan out of oven and stir. Return to the oven and bake 15 minutes more. 
Remove from the oven. Add the freeze-dried fruit (or you can also use any dehydrated fruit of your choice). 
There you go! Make some fantastic granola!  

Always My Very Best,
Your Friend Chef Tess

Monday, May 14, 2012

Making You Own Vegetable Flour

Another Great Share Thanks Deb! This is really Awesome! SRN

Thanks to "Back to the Basics--Hope for the best, Prepare for the Worst" for this note!!!

Starchy vegetables may be used as a thickener for gravies, soups, or stews by first cooking and then mashing or pureeing. Vegetable flour can be made out of squash, pumpkin, yams, potatoes, or carrots. Peel and cut into chunks, then dry in a very slow oven or dehydrator. Grind to a fine powder. When using alternative flours to thicken, dissolve first in cold water to prevent lumps, just as you would cornstarch.  They can also be used to replace other flour in breads.

Adapted from:  http://www.dadamo.com/forum/archived/config.pl?read=123816

Pumpkin Flour

In addition to being a featured player on the autumn decorating scene, pumpkins are chock full of nutrition. However, pumpkin is most commonly used in pies and other baked goods that are loaded down with sugar and unhealthy levels of fats. Pumpkin flour allows you to slip the nutrition of pumpkin into more healthy recipes and reduce the amount of grain flour consumed. While it doesn’t have many of the properties of grains that allow them to form the foundations of breads, pumpkin flour can substitute for part of the flour in most recipes.

Pumpkins sold for Halloween have been bred for appearance, at the expense of flavor. That also makes them ideal for pumpkin flour, especially if you catch the day-after-Halloween jack-o-lantern pumpkin clearance at the supermarket.

Step 1: Peel the Pumpkin
This is the most labor-intensive part, since pumpkin rinds are quite hard. Sharp implements are essential. The easiest way I’ve found to peel a raw pumpkin is to slice the rind off the entire bottom of the pumpkin, then start with a sharp vegetable peeler at the cut end and work in long strokes toward the stem. When you’ve worked all the way around the pumpkin, slice off the stem end, halve the pumpkin and scoop out the guts and seeds, reserving the seeds for roasting.
I have tried halving and gutting the pumpkins first, and found that being able to freely rotate a round pumpkin makes the job easier. The peelings can be composted.

Step 2: Slice the Pumpkin
Thickness isn’t terribly important, but thinner slices dry faster. Anything thicker than a quarter inch runs the risk of sealing moisture in the inside of the slice Running the pumpkin through a mandoline slicer ensures even, thin slices and makes the job run quickly.

Step 3: Dehydrate the Pumpkin Slices
Arrange slices on the racks of a food dehydrator and dehydrate until the slices are brittle. You can also use a solar dehydrator if you have the climate for it at this time of year, or dry the slices in the oven set at the coolest temperature, with a fan running to circulate air.

Step 4: Grind the Dried Pumpkin to Powder
This is the part where dried pumpkin turns into pumpkin flour. You can use a blender or food processor. A grinder gives good results but most are too small to accommodate the slices of dried pumpkin. The consistency you’re looking for is about the same as a whole-grain flour. Grinding is loud; you can deaden the noise a little by wrapping the bowl of the food processor or blender with a towel, but be sure to not block the air vents for the appliance’s motor.

Storage and Use
Store the pumpkin flour in an airtight container in the pantry. Pumpkin flour can substitute for up to a quarter of the grain flour called for in most baked goods recipes. Even made from the bland jack-o-lantern pumpkins, pumpkin flour has a slight squash-like flavor, so it’s less suitable for delicately flavored recipes. I’ve found it works especially well in whole-grain breads, pancakes and waffles. And, of course, pumpkin bread.

Posted by Janet Harriett on Nov.01, 2010
http://www.greendivamom.com/2010/11/01/pumpkin-flour/

Carrot Flour

Click to show "Carrot" result 1Dried Carrot powder can be used to replace some of the flour in breads and baked goods to produce some interesting foods.  Some dog treats can be made from carrot flour.

Carrot powder is obtained by drying and milling carrots without any added substances. It has a very high content of Beta-Carotene and fibers. Carrot powder is an innovative supplement for bakery, confectionery and pasta products. It is a naturally gluten free product thus highly recommended in the gluten free diet in the preparation of tasty, home-made pasta as well as cakes.


 Replace up to 1/4 c of flour with dried carrot powder in your favorite recipe.

In your favorite pasta recipes, start with 1 T of carrot powder and adjust according to the intensity of flavor you prefer.

Dried carrot powder can also be used as a natural colorant to foods.


http://www.barryfarm.com/nutri_info/veggies/carrotpowder.htm

Green Pea Flour

Green Pea Flour can be used to make creamy pea soup with that fresh pea color in just three minutes and contains less than 2% fat.  Can be used in Guacamole and try substituting 1/4 of the regular flour in your sugar cookie or muffin recipe for an St. Paddy's Day treat.Try this delicious quick

Click to show "Pea" result 12Green Pea Soup

3 Tbsp Green Pea Flour
2 cups Hot Water
2 tsp Chicken or Vegetable Bouillon

Stove top: In a saucepan, heat 2 cups water to just about boiling.

Reduce heat to medium and whisk in 3 Tbsp Green Pea Flour and 2 tsp of chicken or vegetable bouillon or soup base.

Cook until mixture boils, then boil for 2 minutes.

Serves 2

http://www.barryfarm.com/nutri_info/flours/greenpea.html

Sweet Potato Flour

Sweet potato flour is produced from white sweet potatoes and is dull white in color, stiff in texture, and has a somewhat sweet flavor.

It is high in fiber and contains a higher level of carbohydrates and lower level of protein than common wheat flour.

It can be used for baked goods, such as breads, cookies, muffins, pancakes, and doughnuts, and as a thickener for sauces and gravies.  Commonly used in gluten free cooking and baking.

Sweet Potato Crepes Recipe

3/4 cup sweet potato flour 1/2 teaspoon vanilla flavoring 2 eggs 1 cup of skim milk 1 tablespoon of nonfat dry milk Pinch of sea salt

Mix all items in a blender or food processor until it has become a creamy batter.

Spray a nonstick skillet heated over a medium heat with nonstick spray. Follow by adding 2 tablespoons of the crepe batter into the skillet.

Tilt the skillet and swirl it in a circular motion until the batter is evenly spread over the pan.
Cook the crepe until the outer edges begin to brown and loosen from the skillet.

Flip the crepe to the other side and cook for about 30 more seconds.
Using a thin spatula, lift the crepe from the pan and serve on a plate.

http://www.barryfarm.com/nutri_info/flours/sweetpotatoflour.htm

Potato Flour

Potato flour is often confused with potato starch, but the flour is produced from the entire dehydrated potato whereas potato starch is produced from the starch only.  It is also used as a thickener for soups, gravies, and sauces.

Potato Flour is heavy and has a definite potato flavor.

Made from the whole potato including the skin and will absorb large amounts of water.
It is not used as the main flour in baking as it will absorb too much liquid and make the product gummy.

Small amounts are used to increase water, hold product together and so on.
It is used as an ingredient in potato based recipes to enhance the potato flavor and is often mixed with other types of flour for baking breads and rolls.

Potato flour Substitutions:

For general baking: Replace up to 1/4 of any wheat flour in a recipe or substitute 5/8 cup potato flour for 1 cup all-purpose flour.

For yeast breads: Replace up to 1/6 of the wheat flour in a bread recipe or substitute 5/8 cup potato flour for each cup of all-purpose flour.

Potato Flour Biscuits and they're Gluten Free as well.
1/2 cup White rice flour
1 tbsp potato flour
2 tsp cane juice crystals
1/8 tsp sea salt
1/2 tsp baking soda
1/3 cup buttermilk
1 tbsp margarine, melted

Preheat oven to 400 degrees F.
Mix together the rice flour, potato flour, sugar, salt and baking soda.
Add buttermilk and margarine and mix until well blended.
Partially flatten pieces of dough with hand and place on cookie sheet.
Bake for 10 to 12 minutes.

http://www.barryfarm.com/nutri_info/flours/potatoflour.html

Spinach Flour

Click to show "Spinach" result 5I picked enough spinach to heap onto the dryer trays (I have five very large trays) and started my spinach to dry at about 10 AM. Right now it is 6:24 PM and I have processed it all and have gotten 12 ounces of my spinach flour.
When you dehydrate the spinach you start with your fresh spinach leaves. Wash them and de-stem. Place the spinach leaves on your dehydrator trays and dry until crisp and brittle. At this point, since we have electricity, I use a food processor and process into flour (a blender works too). If you don't have a food processor, use a ziploc bag, insert the dried spinach, take out the air, zip and use a rolling pin to make into a powder. Takes a little longer this way, but it does work. Your dried spinach may have little flecks of dried spinach in it and this is fine. It does not all have to be a fine grind like flour.

I then pour the spinach flour into a jar and screw on the lid tightly. I use old pasta jars (any jar with a screw on lid will work fine). I place the jars on a shelf in the dark basement where it is cool all year long. These jars last a very long time. My test was I put items in these jars in 1982 and checked and used them this year
(2000)

 Thanks for the Share Joey! SRN
http://www.youtube.com/watch?v=eGNh_K6bhbY
 Making seed planting tape, pumpkin flour, re-using items for water drip trays, saving potatoes, gardening books.

Here are some recipes for using dried spinach:

Pasta Recipe - makes approximately 1 pound2 3/4 cups semolina or unbleached all purpose flour
1/2 teaspoon salt
3 eggs, extra large
1 tablespoon olive oil
In a bowl mix together the flour and salt. Make a well in the center of the dry ingredients and add the eggs. Gently blend with a fork or your fingers, drawing the flour from the sides toward the center. Add the olive oil and mix until dough cleans the sides of the bowl. (IF YOU ARE GOING TO MAKE SPINACH PASTA FROM THE DRIED SPINACH FLOUR NOW IS THE TIME TO ADD 2 OR 3 TABLESPOONS).

Place the dough ball on a lightly floured surface. Knead the dough 5 minutes until it is smooth and does not stick to your hands. It should be one color. Cut the dough into 4 equal pieces with a pasta scraper and let it rest for 5 minutes covered with a piece of plastic wrap. Roll each piece of dough into a ball, kneading gently and flatten with the heel of your hand. Feed the flattened dough through the rollers of a pasta machine, gradually decreasing the space between the rollers by adjusting the notches. I start at 1 and finish at 5 or 6. Roll to desired thickness.

Insert cutting roller heads into the machine and cut the pasta, being careful not to feed it through the cutters at an angle. It is easier to feed the dough through the cutter if the ends are squared off. Dry the pasta until it is dry but not brittle. For longer keeping twice the moist strands into loose loops to dry. They will keep this way a few days in the refrigerator or up to a few months in the freezer. Cook the pasta until it is al dente or tooth tender in 7 quarts of rapidly boiling water to which 2 Tablespoons of salt have been added. Stir with a wooden fork to separate the strands. Test every 2 to 3 minutes for doneness since fresh pasta cooks faster than boxed. Drain pasta in a colander or lift it from the pot with a fork, shaking off the excess water.

Creamy Spinach Soup
Make a thin white sauce (if you need a recipe let me know) add 3-4 tablespoons of spinach flour and stir Stir well, then let set 30 minutes. After the 30 minutes reheat and eat OR 2 Tablespoons unsalted butter 1 teaspoon onion powder 1/4 teaspoon freshly grated nutmeg (can be purchased whole at herb shop or any good grocery store) 2 chicken bouillon cubes 1 1/2 cups milk 1/2 cups half and half 1/4 cup dried powdered spinach Melt butter in saucepan. Add onion powder, nutmeg and bouillon cubes. Crush and dissolve bouillon cubes adding a little milk if necessary. Add remaining milk and half and half. Heat to 185 degrees (just below boiling). Place spinach power in bowl or blender. Pour hot milk mixture over spinach. Blend well. Serve at once. Yield: 3 small cups of soup as an appetizer or 1 large bowl (2 cups) as a main entree.

Spinach Squares
4 tbsp. butter
3 eggs
1 c. flour
1 1/2 cups milk
1 tsp. salt
1 tsp. baking powder
1 lb. grated cheddar
1/4 cup spinach flour
1 tbsp. chopped onion Seasoned salt (opt.)
Preheat oven to 350 degrees. Melt butter in 9 x 13 inch baking dish in oven. Remove dish. Beat eggs then add flour, milk, salt and baking powder. Mix well. Add cheese, spinach flour, onion and mix well. Spoon into dish and level off. Sprinkle with seasoned salt if desired. Bake 35 minutes at 350 degrees. Cool and cut into squares.

Spinach Feta Bread
3/4 cup spinach flour --
2-1/4 teaspoons yeast --
3 cups bread flour --
1/3 cup wheat bran --
1-1/2 tablespoons sugar --
1/2 tablespoon salt --
1/2 tablespoon nutmeg --
1/2 teaspoon black pepper --
3 tablespoons oil --
2 eggs --
1/3 cup feta cheese --
1/2 cup water
Bring all ingredients to room temperature and add to machine. Select white bread cycle.

Spinach Casserole
1 pint cottage cheese
4 eggs, beaten
3 tablespoons flour
1/4 lb. cheddar cheese cubed
1/2 cup spinach flour
3 - 4 tablespoons of butter dash of salt
Mix together cottage cheese, eggs and flour. Add cheese. Cut butter into pieces and combined with mixture. Add salt. Bake uncovered at 350 degrees for 1 hour.

Spinach and Mushroom Quiche
  2 medium onions, white or yellow, chopped
1/2-1" size 8 ounces mushrooms washed and sliced
1/2 to 2/3 cup spinach flour
2 or more cloves garlic, minced
3 or 4 eggs beaten with about
1/2 cup milk
1 cup grated mozzarella cheese
1 cup grated sharp cheddar cheese
1 nine-inch deep dish pie crust
1-2 tbs butter Herb for garnish and flavor, such as Rosemary, Summer Savory, Marjoram
Salt and pepper to taste.

Bake at 350 F for one hour or until no longer juicy inside. Melt the butter over medium heat, saute onions and add garlic in a skillet. When onions are translucent add the mushrooms and cook out the juice. Then add the spinach flour and extra milk if needed and mix together. Add your salt and pepper. Place the pie crust on a cookie sheet or something similar. Transfer vegetable mixture to the pie crust and spread evenly. Sprinkle the mozzarella cheese on top, then sprinkle on the cheddar cheese. Separately gently beat the eggs adding the milk. Salt and pepper can be added to the eggs, add the herb 1/2 tsp. Slowly pour the egg mixture over the cheese and veggies. Sometimes its too full so don't use all the egg. Clean any spilled egg off the cookie sheet and put the quiche back on the pan, sprinkle with additional herbs. Place pan in the lower part of the oven for the first 30 minutes and then transfer to the upper half to finish baking.

SOLAR VEGETABLE SOUP
serves about 6
3 medium chopped tomatoes
1 chopped red onion
1 chopped leek
1 chopped celery stalk
2 small chopped zucchini or other squash
1/3 cup spinach flour
2 1/2 to 3 cups flour basil to taste which is optional dill to taste which is optional, but good
Combine vegetables in a bowl. Mix in water, basil and dill. Pour into your dutch oven and leave in the sun 4 to 6 hours before serving.
Tomato and Cheese Omelette with Mushrooms recipe picture
Cheese Tomato Omelet
1 Tablespoon dried Parmesan cheese
1 Tablespoon chopped dried spinach
1 tablespoon dried broken tomato slices
1/8 teaspoon dried powdered onion

To make the omelet use 1/2 cup powdered eggs 1/4 cup water 1/4 cup water and add 3 tablespoons nonfat dry milk 1/8 teaspoon pepper 1 tablespoon unsalted butter, apricot oil or soy oil Mix together first four ingredients. Melt butter or oil in a 6 or 7 inch frying pan. Pour in egg mixture. Now sprinkle the above dry ingredients over egg mixture as it is browning in the frying pan.