Saturday, March 31, 2012

Try our Soap Recipes for Making Homemade Soap and easy, no-fail Recipes

Soap recipes and homemade soap recipes with easy step-by-step instructions on how to make soap at home. Make your own handmade soap without lye.

Try these soap making recipes for handmade soap. If you missed the first page to this topic visit the how to make soap page which will give you an introduction to soap making, the equipment you need and the precautions you need to take when using lye.

The hand-milled homemade soap recipes allow you to make soap without coming into contact with lye. So, effectively, you are making no lye soap, although technically, it had lye initially to cause a chemical process resulting in soap as a finished product. So, for those of you who would like to make your own soap without using lye are a raw material, these soap making recipes are the answer. They are soaps that are created using store-bought, unscented, white bars. Baby soaps are perfect for this.

HAND-MILLED SOAP MAKING RECIPES for SAGE SOAP
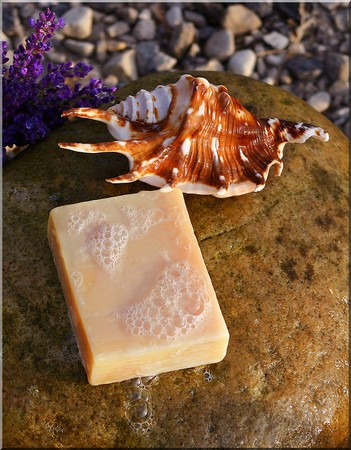
Handmade soap on a stone with a shellPhoto © Malene Thyssen
Here is a soap that you can re-batch, call your own and here you are making soap without using lye or caustic soda. Therefore it is safe, fun and can be used for kids crafts too.

Grate 2 cups of your chosen store-bought white soap, or your homemade Castile soap
Place grated soap in a heat-resistant glass bowl

Add 1/4 cup of water

Take a pot of water simmer over a low heat. Place bowl over the pot of simmering water and heat gently until melted. Do not stir, although you will be tempted. If you do, you will add bubbles to your soap that you don't really want.

Remove from heat and add 1/4 cup rubbed sage. Fold in carefully to mix in ingredients without adding bubbles.

Take a suitable mold, such as an ice cream box, which as been pre-smeared in a thin coating of petroleum jelly to ensure that your soap will be released easily.

Pour your soap into the mold and place in fridge to set.

Once set remove from fridge and release from mold. Place on a cake rack for 3 weeks to dry completely.

Once your soap is dry, cut up your bars accordingly and wrap as desired.

This is a basic homemade soap recipe that you can then use to substitute sage for oatmeal, add a teaspoon of saffron or paprika for coloring etc. Just remember that food colorings are not suitable color additives for making soap.

HAND-MILLED SOAP MAKING RECIPES for OATMEAL and HONEY SOAP

  • 3/4 cup grated white unscented soap
  • 1/4 cup oatmeal
  • 1 tablespoon honey
  • 1 teaspoon almond oil

Make this soap using the same homemade soap recipe as above.

SOAP MAKING RECIPES for BEGINNER'S SOAP

Here you will be using small quantities to start off with, so if you mess it up it's no big deal. Remember, that for your soap to be successful you have to measure your ingredients accurately, make sure that both the temperatures of the lye water and the oils are at 95°F when you mix them together, and that the soap has been sufficiently mixed together so that it has reached the 'trace' stage. When the spoon is dragged through the soap mixture and it leaves an indentation for a few seconds, your mixture has began to turn to soap. This can take from 10 minutes to an hour of mixing.
  • 6 oz coconut oil
  • 6 oz olive oil
  • 5 oz vegetable shortening
  • 2.6 oz lye
  • 1 cup water (8 fluid ounces)

Using your safety glasses, and gloves, carefully combine the lye and water in a glass jar. It will heat up fast, so be careful.

Stir until dissolved and then place the lye in a sink full of ice and water to get it to cool to 95°F.

Melt the vegetable shortening in a stainless steel pot over a low heat. Add the coconut oil and the olive oil. 

Mix well and heat to 95°F.

Make sure that both the lye water and the oils are at 95°F. Now add together carefully, stirring constantly until the mixture begins to trace.

Pour into molds and leave for 24 hours. Release from molds, cut into bars and leave on a wire rack for 3 - 4 weeks to harden. This recipe makes about 5 bars.

Variation: Add 2 tablespoons of oatmeal after the soap has reached the 'trace' stage. Mix thoroughly and then pour into molds as usual.

SOAP MAKING RECIPES for a SMALL BATCH OF SOAP

Again this is a soap recipe for a small batch of soap for you to try out when you first begin making soap. If it turns out a disaster, then at least you haven't wasted a lot of money and ingredients.

 This recipe will make 1 bar of soap.

Mix 5 teaspoons of lye with 1/2 cup of water. Add 1 cup of lard, and whatever extras you may wish to add.

Follow the instructions for making soap.

SOAP MAKING RECIPES for CREAMY CASTILE SOAP

Castile soaps are so called, because the main oil that is used in these soap making recipes is olive oil.
  • 16 oz water
  • 6 oz lye
  • 16 oz olive oil
  • 8 oz coconut oil
  • 17 1/2 oz shortening

Not forgetting your safety glasses and gloves, mix the water and the lye in a large glass bowl or stainless steel pot. The water mixture will get very hot, so take care.

Heat the oils and the shortening over a low heat, stirring often. Heat to about 95°F. This will take about 30 - 40 minutes.

Check the temperature of both the lye water and the oil mixture as both should reach about 95°F at the same time. If one is hotter than the other, place in a sink of cold water to get the temperature down to match the other.

Once the temperatures are even then add the lye to the oils, stirring constantly.
From 10 minutes to an hour of stirring, the mixture should begin to 'trace'. This means that when a spoon is dragged through the mixture, an indentation is left behind for a few seconds. If you do not stir your soap to the point of tracing, then when the soap is poured it will separate into levels of lye and oils, and your soap will not be successful. Once tracing has been reached this is the time to add any herbs, plants or essential oils to your soap, if desired.

Pour your soap into suitable plastic molds, cover with lids and wrap in a heavy blanket for 24 hours.
Once the soaps have hardened they should leave the the molds very easily. If you have trouble, in the future you can use a thin coating of Vaseline on your mold to help with the un-molding process.

You can cut your soap into smaller bars at this stage and leave on a wire rack for 3 - 4 weeks to air dry and harden.

SOAP MAKING RECIPES for ALOE VERA SOAP * Based on the recipe above

  • 1x 4oz bar of Castile soap, grated
  • 2 tablespoons aloe vera gel
  • 1 1/2 tablespoons rosewater
  • 30 drops evening primrose oil
  • 6 drops tangerine essential oil
  • 4 drops juniper essential oil

Take a flat baking tray and line the base with waxed paper. Set aside.

In a glass bowl mix the Aloe Vera gel, the rosewater and evening primrose oil and leave overnight.

The next morning beat the mixture thoroughly. Add the essential oils drop by drop, mixing well after each addition.

Wet your hands, and taking a small amount of mixture ( about 1/3 of a cup at a time) form it into balls.

Place the balls on your baking tray that has been lined with waxed paper.

Leave until dry and firm.

SOAP MAKING RECIPES for TRANSPARENT HONEY SOAP

  • 500 ml distilled water
  • 175 g caustic soda
  • 1.1 kg tallow or fat
  • 50 g honey
  • 225 g coconut oil
  • 2 tablespoons sugar "burnt" so that it caramelizes for the coloring.

Follow the same soap making process below for the Hard Laundry Soap Recipe, adding the honey and coconut oil to the tallow as it melts.

Variations on the above soap making recipe

Add a few drops of perfumed oil to the soap just before you pour it out.

Add half a cup of powdered milk to this homemade soap recipe just before you pour it out for a very smooth, rich, moisturizing soap.

Add half a cup of honey just before you pour it out for a rich, clean soap

Add chamomile or parsley tea, or tea made of calendula petals and hot water instead of water in the recipe - these are all soothing herbs which make a mild soap.

Replace part of the oil with avocado or almond oil for a very rich moisturizing soap.

SOAP MAKING RECIPES for SANDALWOOD SOAP


  • 2 oz Sandalwood essential oil
  • 1/2 oz Sandalwood powder
  • 14 oz tepid water
  • 6 oz lye
  • 18 oz coconut oil
  • 6 oz palm oil
  • 12 oz olive oil
  • 4 oz wheat germ oil

Combine the Sandalwood oil and powder together and set aside.

Blend the water and lye together carefully. Set aside and cool to 95°F.

Gently heat the coconut oil and palm oil together over a low heat. Add the olive oil and the wheat germ oil and then heat to 95°F.

Once the temperatures are the same, mix the lye water into the oils.

Stir the mixture until it reaches the 'trace' stage. Now add the Sandalwood mixture. Stir thoroughly and put into suitable molds.

Leave the soap to set and solidify for about 24 hours. Release the soap from the molds, cut into bars and place on a wire rack to air dry for 3 - 4 weeks.
homemade soap

SOAP MAKING RECIPES for SEED AND SPICE SOAP BALLS (Makes 16)

These are great soaps to make, firstly because they can be made for cheap and novel gifts, and secondly, even the kids can get involved.

  • 350 g Lux Soap Flakes
  • 5 tablespoons water
  • 5 tablespoons olive oil
  • 1 tablespoon ground cinnamon
  • 1 tablespoon ground ginger
  • 1 tablespoon poppy seeds
  • 1 tablespoon sesame seeds

Place the soap flakes - such as Lux - into a large bowl, adding the water and the oil. Mix these ingredients with a spoon. Know knead the mixture with your hands until it resembles play dough. Divide the soap 'dough' into 16 portions by scooping out a rounded tablespoon of soap mixture for each portion, shaping each portion into a ball.

Place one tablespoon of each of the seeds and spices into 4 separate bowls or saucers. Quickly dip a soap ball in a small bowl of cold water then roll it between your hands to evenly wet the surface. Now drop the soap ball into the sesame bowl, dry your hands then spin the bowl around to coat the soap ball evenly with sesame seeds. Roll and press the seed-coated soap ball between your hands to 'fix' the seeds. Working with one seed or spice at a time, repeat this step to coat the remaining soap balls.
These soaps do not need to cure.

SOAP MAKING RECIPES for COLD LAUNDRY SOAP MADE WITH COMMERCIAL LYE

  • 2 quarts strained rendered beef fat (fat around kidneys is best)
  • 1 can lye (14-16 oz)
  • 1 quart water
  • 1/2 cup ammonia
  • 2 tablespoons borax dissolved in 1/2 cup water

Carefully combine the lye and water in a glass jar. It will heat up fast, so be careful.

Stir until dissolved and then place the lye in a sink full of ice and water to get it to cool to 98°F.

Cool the melted beef fat in the same manner to get it down to 98°F too.

When the right temperature has been achieved, add the lye solution into the beef fat and stir well.

Add the ammonia and the borax and continue to stir until it is thick; like honey.

Pour into wooden mold or a glass baking pan that has been coated with a light coating Vaseline to prevent it from sticking.

After 24 hours, cut into bars and allow to harden in a dry place. Grate and use after 3-4 weeks.

SOAP MAKING RECIPES for HARD LAUNDRY SOAP (Makes 6kg)

This homemade soap recipe uses caustic soda, so please take the necessary safety precautions.
  • 500 gm caustic soda
  • 3 kg clean fat, or olive, coconut, sunflower oil, or a combination.
  • 2 liters of cold water or herbal tea

Weigh the caustic soda with gloves and goggles on. Pour water or herbal tea into a jug and add the lye, slowly. It will bubble and heat at this stage, so take care. Set aside to cool while you are measuring the fat.
Melt the fat if necessary, or heat oil to 30 degrees centigrade. The lye (caustic soda / water mixture) should also be at 30 degrees centigrade. Pour the lye into the fat or oil, stirring continuously until well mixed and sponification takes place. This can take as long as 20 minutes or more. When the mixture becomes thick and opaque you have reached that stage. Stop stirring!

Both the lye and the oil need to be at the same temperature or the soap will separate.
Pour mixture into molds and cover with a blanket to stop it cooling too quickly. If an oil film develops on the top, stir again; you may have to do this several times. Soaps made with oil are more likely to react in this way and separate.

After 4 weeks, cut the soap into bars. It should be firm, but not hard at this stage. Now allow to dry and harden for at least another month before using.

SOAP MAKING RECIPES for HOMEMADE SOAP WITHOUT CAUSTIC SODA 

  • 3 kg fat
  • 5 tbsp borax
  • 3 tbsp kerosene
  • 1 tbsp resin

Mix together half a kerosene tin of clean wood ash with 1 kg of lime and 2 3/4 kg of washing soda. Boil this in one kerosene  tin of rain water for 1 hour.

Stand overnight, well covered with hessian bags.

In the morning strain, place in a clean vessel, add fat, borax, kerosene and resin.  Boil for 3 hours stirring often.

Pour into wet mold, and when cold cut into bars. Store to dry for one month before using.

Well, we hope you have enjoyed reading our soap making recipes and feel inspired to try some out yourself. If you have any problems drop us a line through our Craft Forum. We would love to hear from you.
old fashioned soap making
Old-Fashioned Soap Making
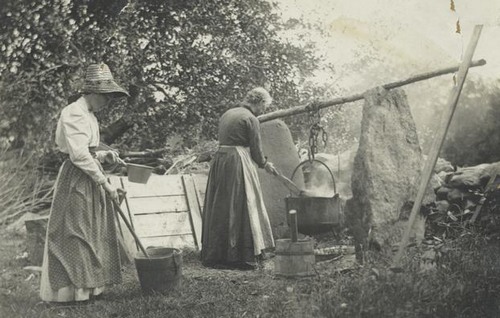
Photo courtesy of NY Public Library.

Thursday, March 29, 2012

How To Regrow Store Bought Celery

Love this! A must Try...


Here’s a great tip on how to make your money go further. Go to your grocery store and grab a package of Celery like in the picture above. Once you’ve gotten it take it home and cut off the bottom of the Celery about one inch up. The picture below shows you about where to cut it and what it should look like.


Your next step is simple. Take the cut off piece and place it in a shallow bowl of warm water. After that either place it in the window or take it outside.

In a couple days after placing it in the bowl you will start to see new leaves growing on the top and roots growing out of the bottom. At this point you can now transplant the Celery into your garden or a growing container. Just plant the whole thing in the soil with the leaves just above the soil.

In about a week the Celery should look similar to this. Remember to water your plants on a regular basis but don’t flood them. Some plants might not make it and some will that’s just the rule of nature!

In a couple more weeks the plant should be striving and growing like a weed. It will start to look like this at that stage.

Once the plant fully grows you can cut the stalks off as needed. The plant will continue to grow the entire growing season. After that you can transplant it indoors and continue to grow it all winter as long as you have a sunny enough area.
You may want to also consider using fertilizer, compost, or manure for the plants because they require a lot of nutrients to grow. Also get rid of any weeds around the plant because they will steal all the nutrients from the plants around them causing stimulated or no growth at all.
The last step in the growing process is to take a soda bottle or milk jug and cut the top and bottom of the containers off and place it around the plant. You do this because it will force the Celery to grow straight up instead of branching off and taking up a lot of room in your garden or growing container. Here’s a photo to show you how to do that.

That’s pretty much it! Enjoy saving yourself some money at the grocery store and also enjoy your healthy food that you grew yourself!

Original Post From Lisa Telquist On rawfoodrehab.ning.com

Organic Lip Balm

Via: Marcia Solomon

My month long challenge of slowly ridding our house of nasty chemicals began more than a month ago. I got on this kick and can’t stop!


I am concocting my own household replacements with little more than what I have on hand or what I can find at the organic market.

But the replacements must meet or exceed three important expectations for this frugal gal:

1. It must be easy to replace-no beakers or science lab experiments. Thank you.
2. It must be just as good or better than the current product I’m using and,
3. It must cost the same or less than the current product I’m using.

photo source unknown
If the product I create passes the final test-me using it for over two plus weeks to make sure it does its job-then I’ll be sharing it with you. I will break down the cost for you, provide you the recipe and give you my honest opinion of the final product.
Today, I’ll be sharing a tested and loved recipe for  Simple, Organic Lip Balm. (ps-I shared this over at Curbly in January)


My hubby and I go through inordinate amount of lip balm. And at $3 a tube, it was beginning to add up. I wanted to find a way that I could circumvent the cost, the unnecessary added chemicals and the need for store-bought lip balm.
For approximately $.25 a tube, I had my very own lip balm without the chemicals.


Here’s what you’ll need to make your very own Simple, Organic Lip Balm:
2 TBS Beeswax Pearls
2 TBS Pure White Refined Shea Butter (you can use unrefined shea butter, it just has a bit of an odor)
4 TBS Sweet Almond Oil
1/4 tsp “Essential” Peppermint Oil (or use Lavender, Cherry, Lime, Eucalyptus, oil)
Double Boiler (or a heat safe bowl set over a pot of simmering water)
Plastic Measuring Cup with a spout
Paper Towels/Rags
(15-20) .15 oz new or recycled tubes or containers (I bought mine from bulkapothecary.com for $0.14 each)


Prepare the lip balm containers by placing in a bowl or pan, without the lids. Help tubes stay upright by wedging paper towels around them.


If using a Double Boiler, fill the bottom pan with water and bring to a slow boil. Place the second pan on top, and melt the beeswax.
If using a heat safe bowl, set the bowl over a pot of simmering water.
Stir continuously with a wire whisk while the next ingredients are added.


Add the 2 TBS of Shea Butter.


Add the 4 TBS of Sweet Almond Oil.


Once liquified, remove the top pan from the heat while continuing to stir.


Whisk in a 1/4 tsp of essential oil. (I used peppermint in my lip balm).


Working quickly, transfer the hot liquid to a room temperature plastic measuring cup with a spout.


Pour the hot liquid into the lip balm containers.


Let cool for 15-20 minutes. Place the lid on the cooled container and enjoy.


I recommend wiping out all pans, measuring cups and spoons with a rag or with paper towels before attempting to wash them. Trust me, I learned the hard way….
Each tube cost me approximately $.25 or less-I had a bit leftover which I use on my cuticles-it’s great for that tough little skin. Hope you enjoy!

My Beautiful Daughter...

Bart and Ashley
Run away goat!

Puppy Love

Her dad and brother, She's the one with the Pink tool belt!

Ashley with her two boys a few years ago. Noah and Ethan they are 10 & 11 now.


Smart and Beautiful

Ashley and Emily (Daughter) Gardening last summer.

A trip to Denver


Beautiful


These are of my Beautiful Daughter. She's an amazing women!
She can and does anything she puts her mind too!


Tuesday, March 27, 2012

Cloning Aloe Vera Plants

Instructions: Cloning Aloe Vera Plants
     

           Fill a 6-inch planter pot with equal parts of soil and peat moss. If your pot does not have a drainage hole in the bottom, place a one to two inch layer of gravel on the bottom to allow for proper drainage. You may add sand or other gritty material to the pot if desired.

        Aloe Vera plants grow many offshoots from their roots, and these shoots have their own set of roots. Retrieve as many four to five inch long shoots as desired. Retain as much of each shoot's roots as possible. Let the shoots sit in a dry, well-ventilated area for a few days before planting. The shoots will be ready to plant when the roots are dry and have calluses.

        Place the plant or shoot in the planter's pot, completely covering the roots with soil. Press the soil around the plant with your fingers to make it firm and well packed.


          Water the plant enough that the moisture can reach the roots. Add fertilizer if desired. Aloe Vera plants store a lot of water in their leaves, so they need only be watered once or twice each week, when the soil in the pot is dry. Ensure that proper drainage is occurring.

       Place the plant in indirect but bright sunlight in a room that is between 70 and 80 degrees Fahrenheit. If the plant has trouble remaining upright, prop it up; half of a Styrofoam cup works well for this purpose.

        When the plant begins to outgrow the planter pot, replant it in a larger one. The new pot should be wider, not deeper, than the original one, as aloe Vera roots grow out rather than down.

Baby Chick Basics. What you need to know to get started

 Love this Article by:

ADozenGirlz, the Chicken Chick

I was more nervous anticipating my first chicks' arrival than my first child's birth. I read everything I could find, only to discover that caring for baby chicks just isn't complicated. All chicks need to thrive is a caring chicken-keeper with safe, warm housing, food and clean water. There is no need to over-think baby chick care.
Baby chicks grow at an astonishing rate, an important consideration when planning brooder set-up.

BE PREPARED
It's important to prepare before chicks arrive. Having housing set up and supplies on-hand makes for a stress-free, enjoyable experience for everyone. Their immediate needs will be water and heat (food, a little later).
Ask the post office to call you as soon as
they arrive for immediate pickup. 
My chicks arrived at 6:00 am and I was there to meet them.
My first chicks arrived in perfect condition from My Pet Chcken.
Mailing chicks is possible because the last thing a chick does before hatching is absorb the egg yolk. This first meal supplies nutrition for up to 3 days. Shipping is hard on chicks, some will not survive the trip. It may be best
not to open the shipping box in front of small children.
BROODER A brooder is simply the chicks' home.
Happy, warm newbies do not huddle together.
Brooder Type: The options are limited to your imagination. I prefer strong cardboard boxes because they're free, they can be added onto to increase living space as chicks grow and they're disposable. A large, plastic container, bathtub, rabbit hutch, and even a kiddie pool will work.
All brooders should be capable of being covered to keep chicks inside and unwanted guests (like well-intentioned family pets) out. Even very young chicks can escape from an uncovered brooder. I rest a spare piece of hardware cloth on top of my brooders beginning in week two. While this is adequate to keep chicks in, a more secure method will be needed to keep pets out.

Brooder Size: Plan on 2 square feet per chick, which will seem excessive initially, but they grow at an unbelievable rate . It's important that they have adequate space available to avoid problems that result from overcrowding, such as picking.
Location: The brooder must be in a draft-free location where a heat lamp can be hung safely or an alternative heating device plugged in; ideally the brooder will be located in a room with a window to allow chicks the benefit of natural day/night conditions.

Bedding: Chicks require a flooring surface that is safe for walking on and absorbent. I recommend paper towels over puppy training pad for the first 5-7 days.
Tiny feet require traction.
 The puppy pad keeps the brooder protected from inevitable water spills and the paper towels provide traction for sure-footedness and are absorbent to wick away moisture from droppings. Paper towels should be changed frequently. Newspaper should never be used as flooring; it is slippery and can cause spraddle leg. 

The most common bedding for chicks is pine shavings. I don't use pine shavings until day 5 because it's easier for chicks to identify food sprinkled on paper towels and I want them to eat the feed, not the shavings.
Water: Chicks require access to clean water at all times. Upon arrival, it's helpful to quickly, gently dip each chick's beak into the water to encourage them to drink. If chicks had a rough trip and look wilted, a vitamin/electrolyte solution can give them a boost. A little sugar added to the water will suffice in a pinch, but it's better to use the vitamins & electrolytes.
To avoid the risk of drowning, it's best to use a commercial waterer versus a shallow dish. Elevating the waterer will help keep shavings out of it but chicks always find a way to poop in it, so frequent changing is necessary.

Feed- Chicks should have access to starter feed at all times. It is nutritionally complete and specially prepared to be easily digested without supplying additional grit.

Medicated chick starter feed protects chicks from contracting coccidiosis, which is an intestinal disease, transmitted through droppings that can quickly kill chicks. Starter feed comes in un-medicated form as well. Some chicks are innoculated against "cocci" and these chicks should NOT be fed medicated starter as doing so renders them unprotected from the disease.

Chicks do not require access to grit if their diet consists solely of starter but if they are fed treats, grit is necessary to aid in digestion. 

Check & tighten wing nut often.
Heat: A heat lamp with a red, 250 watt bulb is inexpensive and the most commonly used heat source. Red is preferred as it is less harsh than white, allowing chicks to rest better and is thought to reduce pecking.


When using a heat lamp, the brooder should be be kept between 90-95° F . A thermometer located approximately 2-4 inches from the brooder floor will indicate whether the lamp needs to be raised or lowered to achieve the target temperature. 
Note thermometer on back wall of brooder.
Each week after the first, the temperature should be reduced by five degrees. That's what I call 'The Formula.*"
The Formula
Week 1= 90-95°
Week 2= 85-90°
Week 3= 80-85°
Week 3= 75-80°
Week 4= 70-75° etc
The Formula is a general guideline, the behavior of chicks is a better indicator of their true comfort level. Happy chicks are quiet chicks.Content chicks will be dispersed throughout the brooder, happily going about their business. When they are too warm, they will pant and stay far away from the light, when they huddle together or cheep noisily like the one in this video, they are not warm enough. Simply adjust the lamp in either case.
Cold, unhappy chicks.

I cannot stress enough that the priority in keeping chicks warm must be safety. Heat lamp parts can loosen, chicks can fly and knock into them, lamps can fall, get knocked over and swing into flammable objects. When using a heat lamp, secure it in several different ways, anticipating the failure of any one and keep it clear of anything flammable.

There are much safer alternatives to heat lamps and  I encourage chicken-keepers to consider them. I have written about the potential hazards of heat lamps in my blog post here as well as explored an alternative heat source, the EcoGlo Brooder. 

Things to Watch Out For and Guard Against
This day old chick hatched with spraddle leg.
There are two fairly common conditions to be on the lookout for: spraddle leg and pasty butt.
Spraddle leg: also known as 'splay leg,' is a deformity of the legs, characterized by feet pointing to the side, instead of forward, making walking difficult, if not impossible. The most common cause is slippery brooder flooring. The deformity can be permanent if unaddressed and is easily fixed, I discuss how to fix spraddle leg  here.

Normal looking vents like these will not have poop caked on them.
Belly button area beneath vent may have residual umbilical cord
attached & should not be pulled or removed.
Pasty Butt: is a condition where loose droppings stick to the down surrounding a chick's vent, building up to form a blockage that can be fatal unless removed. Pasty butt can be caused by stress from shipping, being overheated, too cold or from something they have eaten. All chicks should be checked for pasty butt upon arrival. If droppinngs are caked onto the vent area, they can be loosened with a dip in warm water or a damp washcloth or paper towel and gently removed, being careful not to pull as the skin can tear. After cleaning and drying the vent area, the application of petroleum jelly or triple antibiotic ointment can prevent the droppings from sticking to the down.
                                                                                                                                                                                                                                                                                                                                                                                                                     
If several chicks develop pasty butt after a few days in the brooder, it may be too hot and the temperature should be adjusted.
Tiny Diva.
Warmth, a clean brooder, fresh water and proper feed is all chicks require to thrive. Enjoy your baby chicks and keep those cameras handy!

*The truth about The Formula: While 90° heat is critical in the first few weeks of life, but despite The Formula, chicks do not need as much constant heat as a heat lamp provides and are capable of regulating their own body temperatures as seen when raised by a mother hen. See here for more on the subject.
These chicks were hatched by a mama hen and were contemplating some outside time.